
We highly recommend that the serious conversion project not be undertaken without consulting one of the two electric motor calculators that are available. These spreadsheet-like calculators allow a user to plug in different values for the various components in an electric system (specific motor model, prop, battery, gear box, etc.), and then get a guesstimate of that system's performance. Since the number of components available these days is enormous and only getting more so, these calculators are invaluable in helping a builder find the right motor combination.
You can download a free trial version of MotoCalc at www.motocalc.com. The other contender is ECalc which you can find at www.hobby-lobby.com. There is also a free, online calculator from Diversity Aircraft which can be found at http://brantuas.com
We are not going to recommend any specific motor systems for our aircraft, simply because there are so many solutions. We will however present the data collected from our own experiments with electric power systems and then you can make your own informed decision as to the power system you might wish to use.
By: Doug Lee
Today's market place in radio control electric-powered aircraft models has exploded for many reasons. Part of it is the constantly improving technology in motors, batteries and speed controls. Another factor contributing to the expanding phenomenon is the increased difficulty of finding a place to fly R/C aircraft because of noise constraints. Electric models have an advantage because they make very little noise and can be flown on school grounds or in open park areas. They also tend to be smaller in size, thus requiring a much smaller flying area.
My first experience in converting a glow fuel model to electric power was done on a basic trainer type model. I regularly import ARF models for resale from a Chinese company and they send me new prototype models to evaluate on a regular basis. The first model I converted is called a Flyboy 15 and was designed for a .10-.15 cid glow engine. This conversion was fairly straightforward.
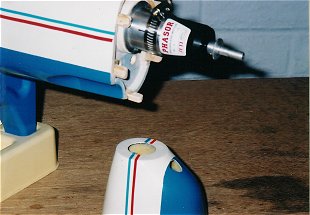
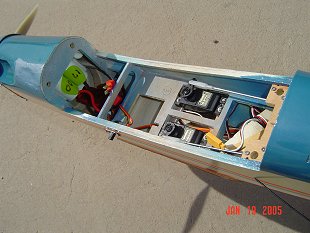
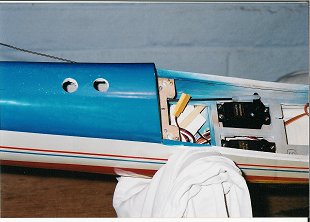
The first step is to replace the glow engine with an electric motor and speed control. A brushed 600 Speed motor was placed in a commercially made resin cast mount that attaches to the model's firewall. A bottom hatch was cut into the fuselage floor under the wing for access to the battery pack. I also added a cooling vent hole behind the battery hatch door. Having such great success with this first model conversion I decided to tackle a larger more sophiscated model. At present, I import a .40 cid class pattern model called the Flyboy II. This seemed like a perfect subject since I had one already assembled that is used as a display model at trade shows. The conversion process requires the selection on an appropriate motor, battery, speed control and propeller.
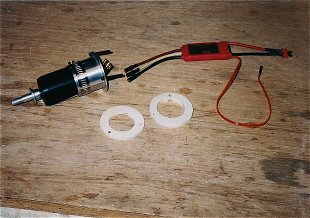
I knew this model's weight without a radio or engine was 36 oz. I then made up a table showing the weight of each component; airframe, motor, motor mount, speed control, radio system and various batteries. The battery weight can vary depending on capacity, number of cells and type of battery: NiCd, NiMi or Lithium-polymer (Li-poly). Using this table and the performance specifications of various motors, I selected a Jeti Phasor 30 - 3 brushless motor. This motor, with the right propeller, closely approximates the power of a .30 cid glow engine. With a 9 - 7 �"E APC propeller, and a 10-cell Sanyo CP-1700 mAh NiCd pack this motor should draw about 25 amps and produce 250 watts input to the propeller. A Jeti Jes 40 � 3P speed control will handle that current level and was chosen to round out the system.

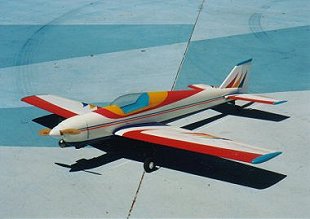
At this point I had completed the model but still didn't know what I had. The model came out at 4 1/4 lbs weight, 1/4 lb lighter than a .46 cid glow engine version I have been flying. Time to go to the field. I chose to make preliminary test flights at my usual power plane field, Tucson Radio Control Club. I set the control movements of the model control surfaces the same as the previous glow power version for first flights. I had a little fun with my modeling friends at the field at this point. They had seen the glow engine version fly many times. I asked my friend Tom to help me start the engine for the first flight. He came over and looked at the model and gave me an inquiring look, I told him to just put it on the runway and throw the switch on the fuselage side. I advanced the transmitter throttle and the model accelerated away immediately and took to the air with authority. The flyers sitting under the ramada immediately complained about the loud engine noise in a comical way. After a few clicks of trim on the transmitter the Flyboy II was flying perfectly. Model speed was slower than with a .46 glow engine but still very smooth and predictable. Aerobatics such as rolls, point rolls, loops, hammerheads, avalanches and rolling circles were pleasant and graceful. The model will fly knife-edge and knife-to-knife snaps are easily performed. Flight time is about 5-6 minutes with the 1700 mAh 10-cell battery.
If I had to do it again I probably would have used a 3-cell Lithium-polymer battery of higher capacity for more duration. This type of battery costs more but would be of lighter weight and add more performance to the model. All in all the model is exciting and pleasant to fly and was an enjoyable project.
By: Jack Irey
San Diego, CA
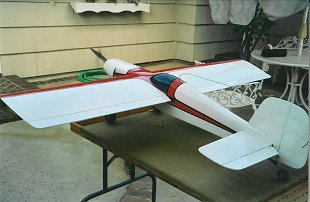
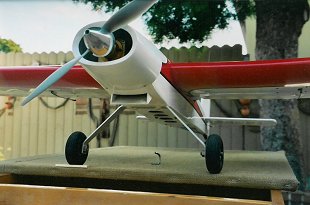
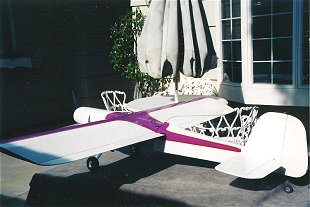
Jack is using a Jeti Phasor 45-3 brushless motor, a 1.5 to 1 gear box from Model Machining, a 5S 6Ah Lithium Polymer battery pack for motor power and a 4-cell AAA Nimh battery pack for receiver/servo power.
 click here for large photos
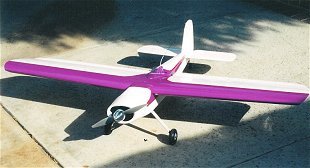
"The thing I like best about the Togo is the full stall 3-point landings every time. It is the first model that I could do that. You have an excellent kit, you should design a 3D kit like Cermarks ARFs, lightweight, 700 to 800 square inches."Jack has built two electric Togos, both with slight modifications from the plans. These include the addditon of slight dihedral to the wing, modified tail fin and rudder, modified firewalls and canopy mounting. The turtle deck has also been modified on one model.
 click here for large photos


